We are happy to announce the release of the library for the Texas Instruments Launchpads! With this library it just got really easy to connect these devices to thethings.iO. And it is available for the open source IDE “Energia” as well as for “Code Composer Studio”! The first one was tested on the CC3200 launchpad and on the MSP-EXP432P401R Launchpad with the CC3100 booster and the second one was tested on the CC3200 launchpad.
So, let’s get right to it! Here, we assume that you have already worked with the launchpads. If you want more examples or a more step by step introduction, soon we we will publish more detailed tutorials. You can find our API reference at github.com.
Step 1: Create a product at thethings.iO
1.1 Get an account at thethings.iO
If you already have an account you can skip this step.
- Go to thethings.io.
- In the upper right corner click on ‘Start now’
- Register.
1.2 Create your first product
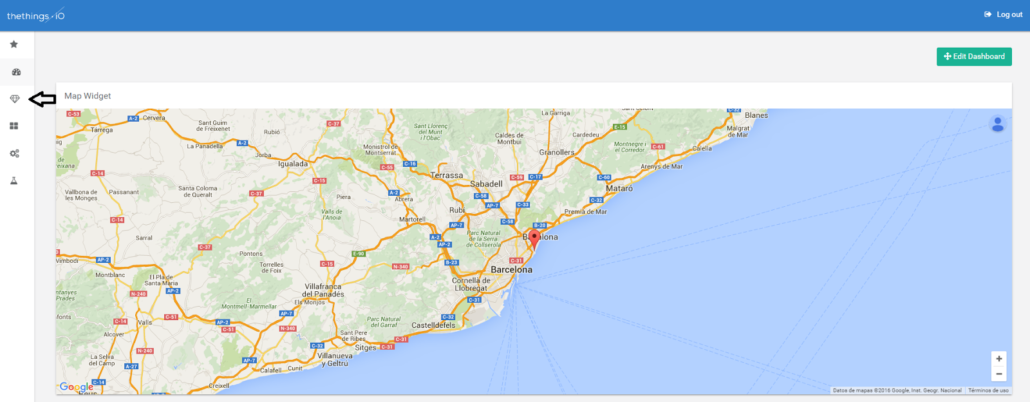
- In your account, at the sidebar on the left click on ‘Things’.
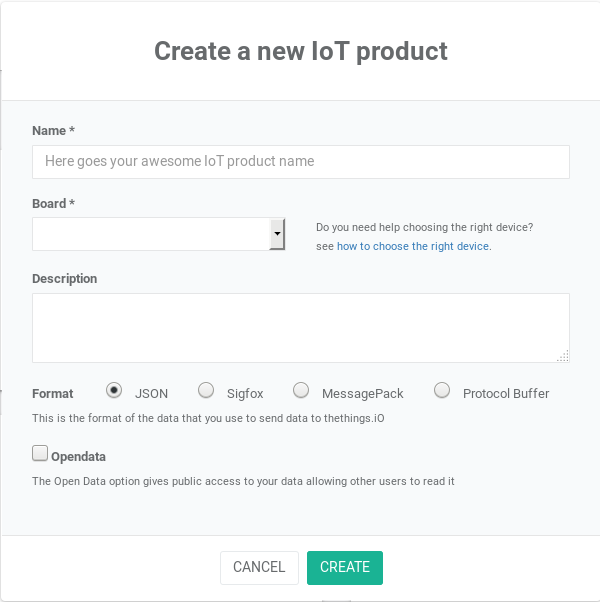
- Then click on ‘Create New Product’ and you will see the following screen:
- Fill out the name of your new product.
- For ‘Board’ choose ‘Other’.
- If you want, you can add a description.
- We will leave the format at JSON.
- Leave ‘Opendata’ unmarked.
- Click on ‘Create’.
1.3 Activate your thing!
- Click on your new product.
- In the ‘Things’ section click on ‘Get activation codes’.
- Then click on ‘Generate Activation Codes’.
- You will be asked how many activation codes you need, leave it at 1 and click ‘Generate’.
- Then click on the ‘+’ sign on the right side.
- A window will open, click on ‘Accept’.
Congratulations! You have just activated your first thing on thethings.iO!
Step 2: Try an example from the library
2.1 Download and extract the library
- Go to https://github.com/theThings/thethings.iO-TexasInstruments-library
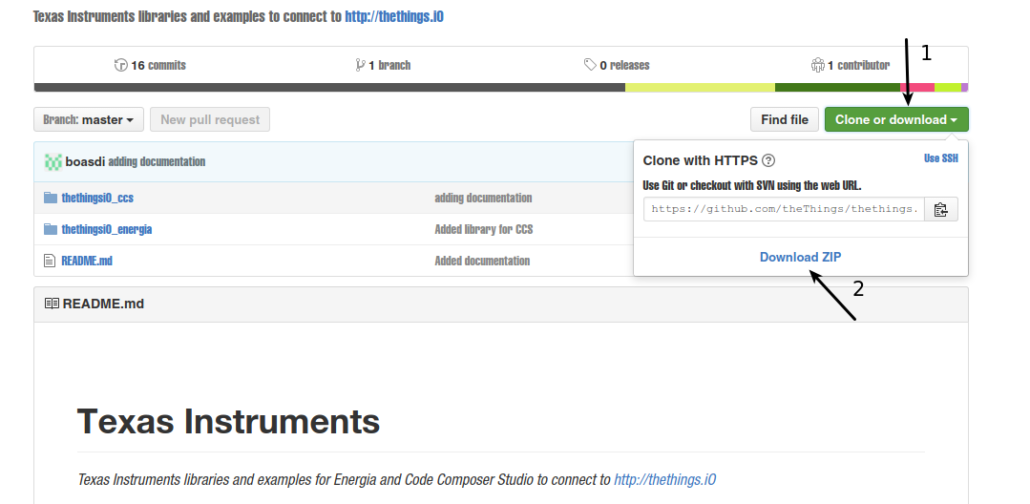
- Click on ‘Clone or download’ and then on ‘Download ZIP’:
- Extract the downloaded archive and copy the folder ‘thethingsiO_energia’ to C:Users[your user name]DocumentsEnergialibraries
2.2 Open and edit the example
In this step we will try an example that generates random numbers and sends them to our thing at thethings.IO.
- Open Energia and select ‘Open…’ from the ‘File’ menu
- Navigate to C:Users[your user name]DocumentsEnergialibrariesthethingsiO_energiaexamples and select ‘send_random’
- A window will pop up telling you that the file ‘send_random.ino’ needs to be inside a sketch folder and asking you if it should create the folder and move the file for you.
- Click ‘Ok’ (It will actually move the file, so you will “lose” the original if you don’t copy it back).
- In line 11, put the name of your network (SSID).
- In line 13, put the password of your network.
- Next, we need to know our token.
- Enter into your account at thethings.iO
- Go to your things by clicking on ‘Things’ at the left sidepane:
- Then click on the thing that you created in step 1.
- Now you can see your Thing Token.
- Put that token in line 8 of our example code.
2.3 Execute the example
Upload the sketch to your launchpad!
2.4 See the random numbers arriving at thethings.iO!
- Log into your account at thethings.iO
- Click on ‘Things’ at the left sidepanel.
- Click on the thing you created at step 1.
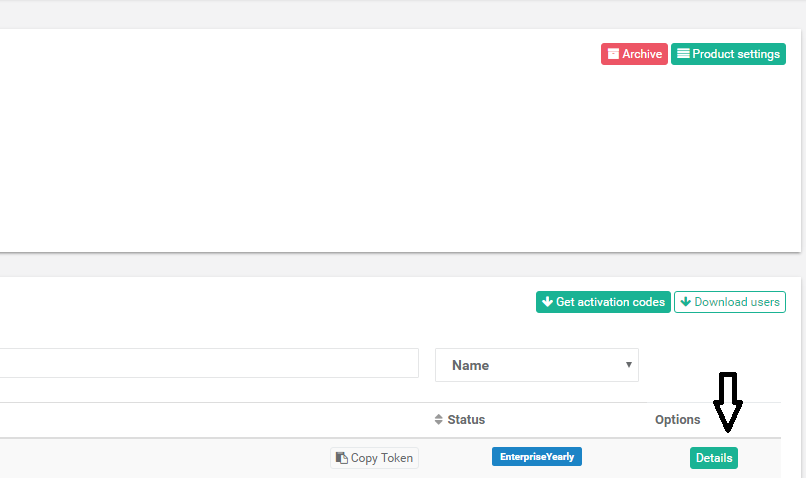
- Click on ‘Details’ of the token you copied in the code:
- In the resource section, choose ‘random’:
- Then click on ‘Real-time’…
- And see the random numbers arriving!
Step 2: Try an example from the library
In this step we will execute an example provided by the library that sends random numbers to thethings.iO.
2.1 Download the library
- Go to https://github.com/theThings/thethings.iO-TexasInstruments-library
- Click on ‘Clone or download’ and then on ‘Download ZIP’:
2.2 Import the example as a project
- Unpack the zip folder you just downloaded.
- Open Code Composer Studio
- Then select ‘Project’ -> ‘Import CSS Projects…’ from the menu.
- In the window that opens, mark ‘Select Archive File’ and click on ‘Browse’:
- Go to the folder thethings.iO-TexasInstruments-library-master you just unpacked
- And navigate to the thethingsiO_css -> examples -> send_random_ttiO
- Select ‘send_random_ti_css.zip’ and click on ‘Open’.
- ‘send_random_ttiO’ should appear as discovered project.
- Select it and click on ‘Finish’.
2.3 Execute the example
The example we just imported, generates random numbers and sends them to thethings.iO. We only have to change one line in order to make it work:
- In Code Composer Studio, go to the Project Explorer and select ‘send_random_ttio’ so that it is marked as ‘[Active – Release]’.
- Next thing, we need to know our token.
- Enter into your account at thethings.io.
- Go to your things by clicking on ‘Things’ at the left sidepane:
- Then click on the thing that you created in step 1.
- Now you can see your Thing Token.
- After that, open the main file and copy your token in line 41.
- Save the changes
- Debug the application clicking on the debug icon:
- Execute the application by pressing the execute (or F8) button to execute the application:
2.4 See random numbers arriving at thethings.iO!
- Log into your account at thethings.iO
- Click on ‘Things’ at the left sidepane.
- Click on the thing you created at step 2.
- Click on ‘Details’ of the token you copied in the code:
- In the resource section, choose ‘random’:
- Then click on ‘Real-time’…
- And see the random numbers arriving!
Get Creative!
Congratulations!! You just set up your launchpad with thethings.iO! Now it is time for you to make your ideas reality. You can use the thethings.iO library and change one of the examples or start from scratch. You can find our API reference at github.com. Happy coding!
